Carnival lesson 17
Translated by Marion.
Thank you.

Take me with you, I'll show you where you left off.
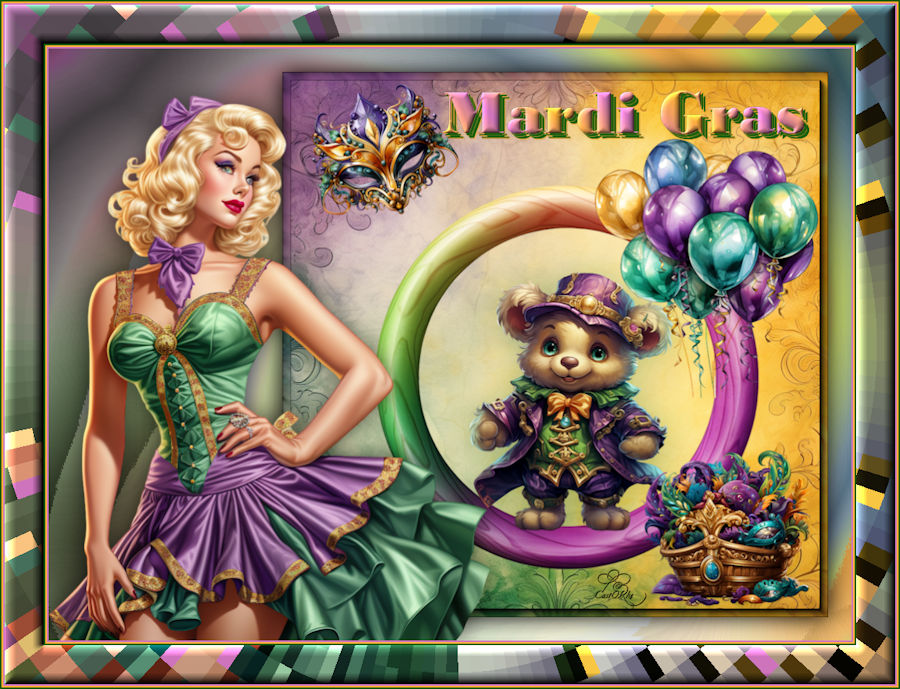
![]()
1. Open your color palette in your psp..
2. Open the tube : Mardi Gras Paper (11)
3. Shift + D to duplicate your image.
4. Open the tube : Mardi Gras Frame (2)
5. Edit- Copy .
6. Activate your work.
7. Edit - Paste as new layer
8. Pick Tool: (K) on your keyboard -Enter these parameters on the toolbar
Position X 174 -- Position Y 213
9. Open the tube : Mardi Gras Element (91)
10. Edit- Copy .
11. Activate your work..
12. Edit - Paste as new layer.
13. Image- Resize 90%
Resize all layers- not checked
14. Pick Tool: (K) on your keyboard -Enter these parameters on the toolbar
Position X 349 - Position Y 375
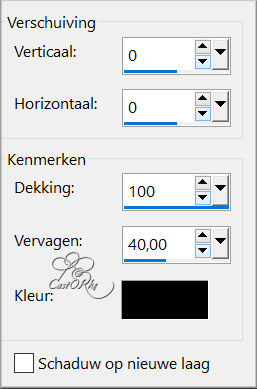
15. Effects- 3D-Effects-Drop Shadow with these settings: 0, 0, 30, 100 kleur 3
16. Open the tube : Mardi Gras Element (84)
17. Edit- Copy .
18. Activate your work..
19. Edit - Paste as new layer.
20. Image- Resize 60%
21. Pick Tool: (K) on your keyboard -Enter these parameters on the toolbar
Position X 672 - Position Y 711
22. Open the tube : Mardi Gras Element (42)
23. Edit- Copy .
24. Activate your work..
25. Edit - Paste as new layer.
26. Image -Resize 90%
27. Image - Mirror - Mirror Horizontal (Image - Mirror in older versions of PSP)
28. Pick Tool: (K) on your keyboard -Enter these parameters on the toolbar
Position X 586 - Position Y 125
29. Open the tube Mardi Gras Element (50)
30. Edit- Copy .
31. Activate your work..
32. Edit - Paste as new layer.
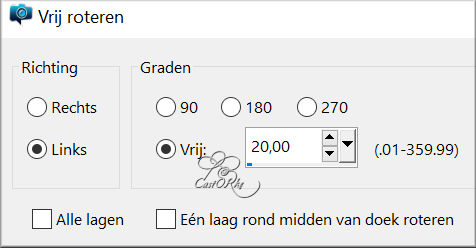
33. Image -Resize 50%
34. Image / Free Rotate / Left 20
35. Pick Tool: (K) on your keyboard -Enter these parameters on the toolbar
Position X 53 - Position Y 22
36. - Activate the bottom of the layer palette
37. Effects/ Plugins / AAA Frames/ Fotoframe width 15 and OK
38. Layers- Merge- Merge All
39. Image -Resize 700 PX width (height adjusts itself).
40. Resize all layers- Checked.
41. Promote Background Layer.
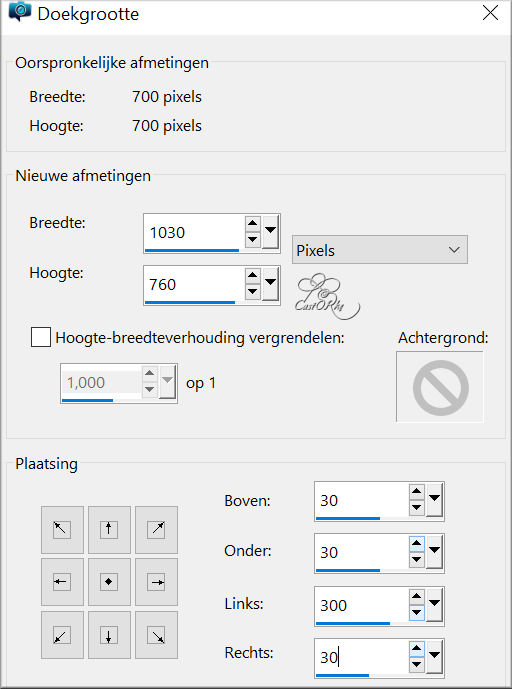
42. Selections- Select All
43. Image -Canvas Size 1030 x 760
Top 30 , Bottom 30 , Left 300 , Right 30
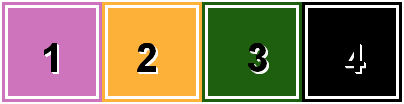
44. Effects- 3D-Effects-Drop Shadow with these settings: 0, 0, 100, 40 color 4 (black)
45. Selections -Invert.
46. Layers- New Raster Layer .
47. Open the tube : deco
48. Edit- Copy .
49. Activate your work..
50. Edit -Paste into Selection.
51. Selections-Select None
52. Layers- Arrange- Move Down
53. Activate the top of the layer palette.
54. Open the tube : Mardi Gras Tubes 1 (2)
55. Edit- Copy .
56. Activate your work..
57. Edit - Paste as new layer.
58. Image -Resize 70%
Resize all layers- Not checked
59. Pick Tool: (K) on your keyboard -Enter these parameters on the toolbar
Position X 0 - Position Y 60
60. Effects- 3D-Effects-Drop Shadow with these settings: 0, 0, 50, 40 color 4 (black).
61. Image - Add borders-Symmetric checked: 2 Px -color 1
62. Image - Add borders-Symmetric checked: 2 Px -color 2
63. Image - Add borders-Symmetric checked: 2 Px - color 3
64. Edit- Copy .
65. Open the tube : Kader.
66. Shift + D to duplicate. We continue working on this.
Close the original.
67. Activate your Magic Wand Tool _ Feather 0 , Tolerance 0
68. With your Magic Wand click in the middle of the transparent part
69. Edit -Paste into Selection.
70. Selections- Select None .
71. Open the tube: tekst.
72. Edit- Copy .
73. Activate your work..
74. Edit - Paste as new layer.
75. Image -Resize 80%
76. Put in the right place or to your choice.
77. Add you watermark on new layer.
78. Image - Add borders-Symmetric checked: 2 Px -color 1
79. Image - Add borders-Symmetric checked: 2 Px -color 2
80. Image - Add borders-Symmetric checked: 2 Px -color 3
81. Image Resize 900 Px -Resize all layers- Checked
82. Save as JPG