Mogelijk gemaakt door  Translate
 Translated by Marion into French, German, English
Thank you very much.
Click on the flag for the translation.
This lesson was written by myself.
Any resemblance with an existing lesson is a coincidence
This tutorial was made with PSP 9
but can be done with other versions of Psp
Material:
Tubes :elements from scrap Sc_Bunnie .
Thanks to the tubeuses.
Without them, it would not be possible to make the tutorials.
Keep the tubes intact and do not present them as your own work
Filters:
Simple/ Pizza Slice Mirror, Simple/ Diamonds
Material
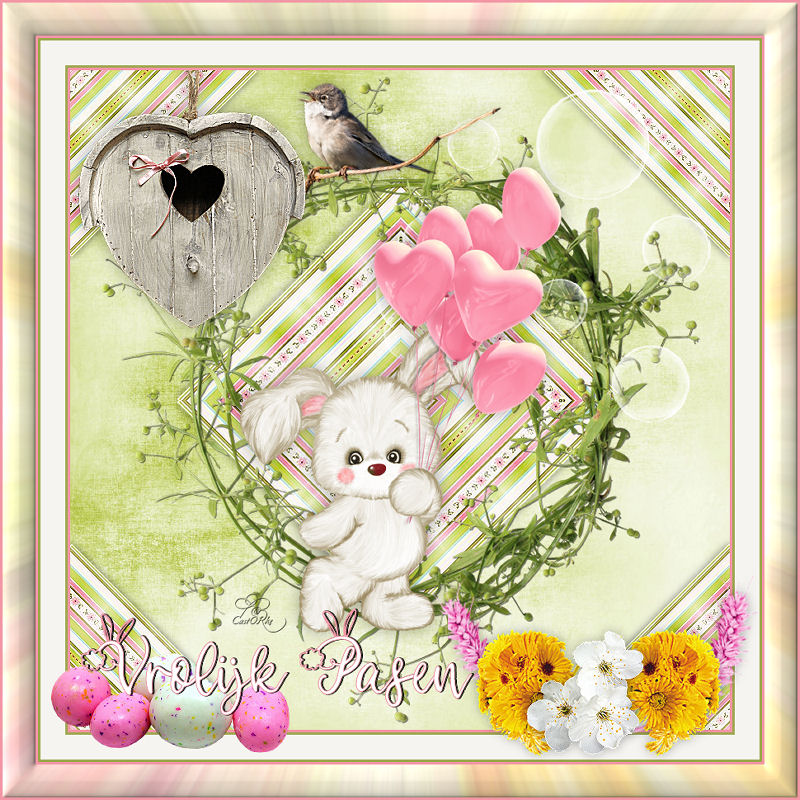
Let's start the lesson
Take me with you, I'll show you where you left off.

Unzip your material into a folder that you can easily access
Save your work regularly !
TIP: Duplicate your tubes and work with the copies
1. Open easter_les32_Color palette
2. Open alpha channel _les32_pas
3. Shift +D to duplicate the image.
Close the original we continue working on the copy.
4. Selections- Select All.
5. Open SC_BunniesandChicks_Paper05
6. Edit - Copy
7. Activate your work.
8. Edit - Paste into selection.
9. Selections/Deselect All.
10. Image - Resize to 80%
Resize all Layers not checked
11.Selections –load/save selection –Load selection from Alpha Channel #1
12. Selections /Invert.
13. Delete .
14. Selections/Deselect All.
15. Effects – 3D-Effects – Drop Shadow with these settings: 0, 0, 40, 20 Color Black.
16. Effects/Plugins/ Simple/ Pizza Slice Mirror
17. Adjust-Sharpness-Sharpen.
18. Effects/ Plugins/ Simple/ Diamonds
19.Selections –load/save selection –Load selection from Alpha Channel #1
20. Selections- Promote selection to layer.
21. Selections/Deselect All..
22. Image -Resize with 120%
23. Layers- Merge- Merge Down
24. Layers- New Raster Layer
25. Open the Tube SC_BunniesandChicks_Paper09
26. Edit - Copy
27. Activate your work.
28. Selections- Select All.
29. Edit - Paste into selection.
30. Selections/Deselect All.
31. Layers Arrange-Sent to Bottom
32. To replace the top of the layer-palette.
33. Open the Tube SC_BunniesandChicks_wreath
34. Edit - Copy
35. Activate your work.
36. Edit - Paste as a new layer .
37. Image -Resize with 110 %
38. Effects – 3D-Effects – Drop Shadow with these settings: 1, 1, 50, 0 Color Black.
39. Open SC_BunniesandChicks_bubbles
40. Edit - Copy
41. Activate your work.
42. Edit - Paste as a new layer .
43. Pick Tool: (K) on your keyboard -Enter these parameters on the toolbar X 370, positie Y 23

44. Layers- Duplicate.
45. Open SC_BunniesandChicks_bunny03
46. Edit - Copy
47. Activate your work.
48. Edit - Paste as a new layer .
49. Image- Resize 90%
50. Effects – 3D-Effects – Drop Shadow with these settings: 0, 0, 30, 30 color black.
51. Open SC_BunniesandChicks_birdhouse
52. Edit - Copy
53. Activate your work.
54. Edit - Paste as a new layer .
55. Image- Resize 70% .
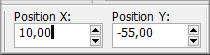
56. Pick Tool: (K) on your keyboard -Enter these parameters on the toolbar X 10, positie Y (min) -55
57. Effects – 3D-Effects – Drop Shadow with these settings: 0, 0, 30, 30 color black.
58. Adjust-Sharpness-Sharpen.
59. Open SC_BunniesandChicks_bird
60. Edit - Copy
61. Image Resize 65% and repeat once
62. Edit - Copy
63. Activate your work.
64. Edit - Paste as a new layer .
65. Pick Tool: (K) on your keyboard -Enter these parameters on the toolbar X 242, positie Y (min)-13, Angle 15

66. Effects – 3D-Effects – Drop Shadow with these settings: 0, 0, 30, 30 Color Black.
67.Layers- Arrange- Move Down.
68. Image - Add borders-Symmetric checked: 3 pixels color 1
69. Image - Add borders-Symmetric checked: 3 pixels color 2
70. Image - Add borders-Symmetric checked: 30 pixels color 3
71. Image - Add borders-Symmetric checked: 3 pixels color 2
72. Image - Add borders-Symmetric checked: 3 pixels color 1
73. Open the Tube les32_bloemen.
74. Edit - Copy
75. Activate your work.
76. Edit - Paste as a new layer .
77. Image- Resize 90%
78. Move the tube to the bottom right.
79. Open the Tube SC_BunniesandChicks_eggs01
82. Edit - Copy
81. Activate your work.
82. Edit - Paste as a new layer .
83. Image -Resize 80%
84. Move the tube to the bottom left.
85. Open the Tube text_Vrolijk Pasen.
86. Edit - Copy
87. Activate your work.
88. Edit - Paste as a new layer .
89. Move the tube to the bottom .
90. Selections- Select All.
91. Image - Add borders-Symmetric checked: 40 pixels color 3
92. Selections/ Invert.
93. Effects/ Plugins/ Simple/ Diamonds
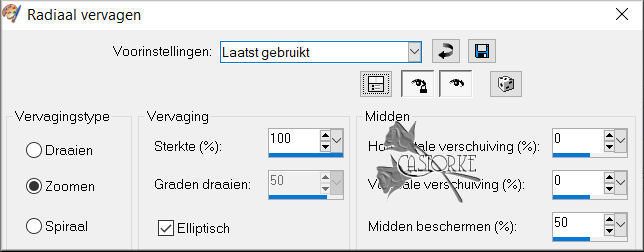
94. Adjust- Blur- Radial Blur use the settings below.
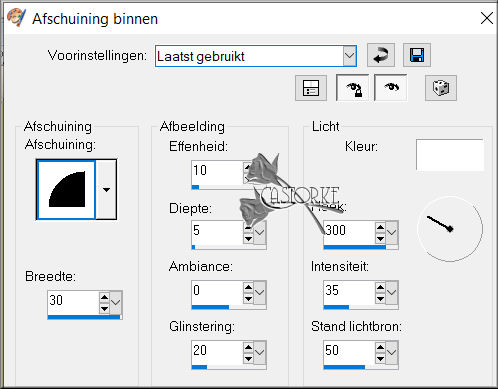
95. Effects- 3 D-Effects- Inner Bevel use the settings below
96. Selections/Deselect All.
97. Place your name or watermark.
98. Image - Add borders-Symmetric checked: 3 pixels color 1
99. Image resize with 800 Pixels width- Resize all Layers checked.
100. Save as JPG
I hope you enjoyed this lesson
I am curious to see your work. Please send it to me in original size.
I'll post it with the other works. Hier
Do include your name, the lesson number, and the title.
Good luck !
Thanks for creating the lesson.
Questions related to the lesson ? Or submit the lesson Mail me
Greetings Castorke
Copying all or part of this lesson is prohibited.
The lessons are registered with TWI

België
2023