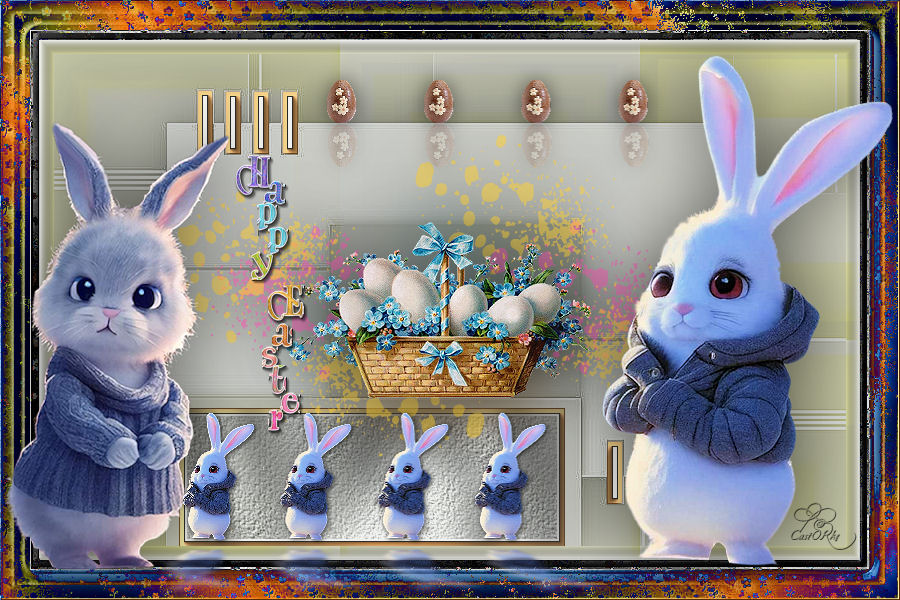
PSP - Easter lesson 33
Translation by Marion into Français, Anglais, Allemand
Thank You kindly.
Click on the flag for the translation.
This lesson is by myself
Any resemblance with an existing lesson is a coincidence
This tutorial was made with PSP 9 but can be done with other versions of Psp.
SUPPLIES:
Tubes : Cloclo, elementen uit scrap Sc_Bunnie and chicks
Thanks to the tubsters for the beautiful material.
Respect their work, don't change anything about the tubes and don't say they are your tubes
Without them, this lesson would not be possible.
The copyright belongs to the original artist. Leave credit with the creator.
PLUGINS:
Mehdi/ SortingTiles, AAA Frames_fotoframe…, GraphicsPlus/ cross shadow, / EyeCandy5/ Impact/Perspective Shadow
Material
Let's start the lesson
Take me with you, I'll show you where you left off.

Open the tubes in a map of your choice or in the program PSP
Save your work regularly !
TIP: Duplicate your tubes and image. Close the originals and minimize the copies for now.
Place your texture in your textures folder
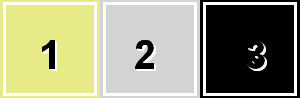
1. Open your color palette in your psp. "pasen_les33_Kleurpallet"
2. Open Alpha Channel : " alphakanaal_pas _les33 "
3. Duplicate the IMAGE ( SHIFT + D ) and close the original. .
Close the original, we work on the copy
4. Selections/Load/Save Selection/Load Selection 1 from Alpha Channel
5.
Flood Fill Tool-Fill the selection with the Foreground color -#e8e987 =1
6. Layers- New Raster Layer
7. Flood Fill Tool-Fill the selection with the Background color #d2d4d1 =2
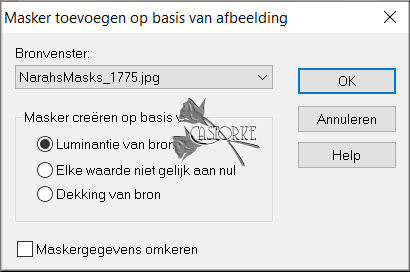
8. Open your Masker NarahsMasks_1775 en minimize.
9.Layers- New Mask Layer- From Image.
10. Select Mask "NarahsMasks_1775 and OK
11. Effects- Edge Effects-Enhance More.
12. Layers-Merge- Merge Group.
13. Layers- Duplicate.
14. Layer Palette
Activate the Layer Group -Raster 2 (middle layer)
15. Layers- Merge- Merge Down.
16. Selection remain activated !
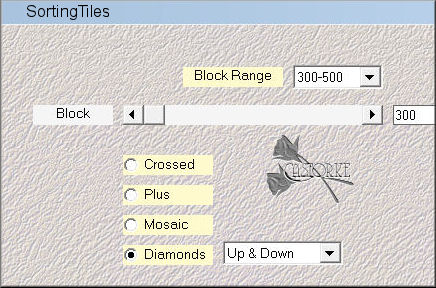
17. Effects/Plugins/ Medhi/SortingTiles Diamonds 300 use the settings below
18. Selections- Select None
19. Activate the top of the layer palette
20. Effects- 3D-Effects-Drop Shadow with these settings: 0, 0, 75, 75 kleur zwart.
21. Stay on this layer.
22. Selections/Load/Save Selection/Load Selection 1 from Alpha Channel
23. Selections -Invert
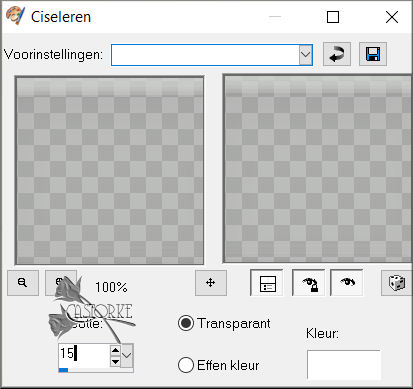
24. Effects- 3D-effects-Shisel
size 15 -color white - transparent checked
25. Layer Palette-Activate the Copy of Group - Raster 2
26. Selections/Load/Save Selection/Load Selection 2 from Alpha Channel
27. Promote Selection to Layer.
28. Effects-Texture Effects-Texture select zilver-vonne
use the settings below

Selection remain activated !
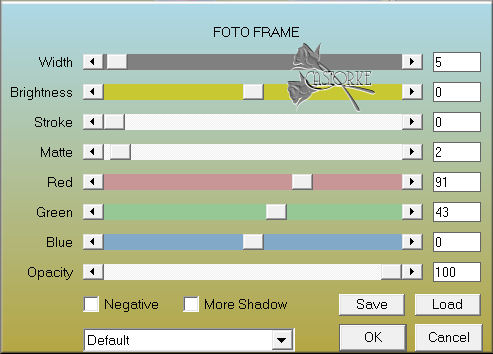
29. Effects- Plugins-AAA Frames- Foto Frames…use the settings below
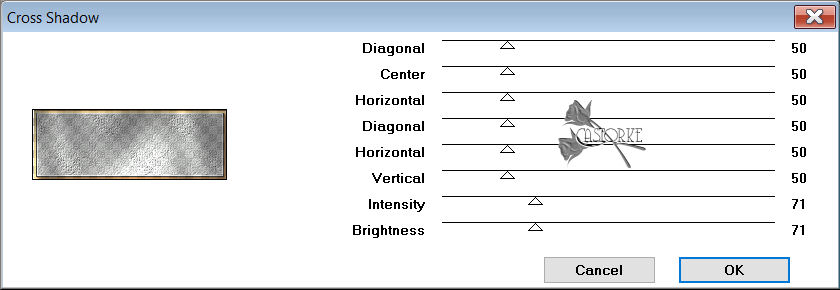
30. Effects- Plugins- GraphicsPlus-Cross Shadow use the settings below.
31. Selections- Select None
32. Open the tube "kader_pas_les33 "
33. Edit -Copy
34. Activate your work.
35. Edit - Paste as new layer.
36. Open the Tube "SC_BunniesandChicks_thingamabob09"
37. Edit -Copy
38. Activate your work.
39. Edit - Paste as new layer.
40. Pick Tool: (K) on your keyboard -Enter these parameters on the toolbar
Position X 145 - Position Y 190
41. Layers- Duplicate
42.
Image - Mirror - Mirror Horizontal (Image - Mirror in older versions of PSP)
43. Image - Mirror - Mirror vertical ( Image - Flip in older versions of PSP)
44. Layers- Merge- Merge Down
45. Effects- 3D-Effects-Drop Shadow with these settings: 0, 0, 75, 100 Color Black
46. Open the Tube "EggFlwrsBasket"
Edit -Copy
Activate your work.
Edit - Paste as new layer.
47. Image-Resize 2 x 80%
Resize all layers not checked
48.
Image - Mirror - Mirror Horizontal (Image - Mirror in older versions of PSP)
49. Adjust- Sharpness- Sharpen
50. Pick Tool: (K) on your keyboard -Enter these parameters on the toolbar plaats op positie X 285 - positie Y 222
51. Effects- 3D-Effects-Drop Shadow with these settings: 0, 0, 50, 100 Color Black
52. Layers- Duplicate
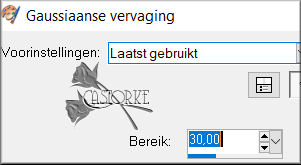
53. Adjust-Blur- Gaussian Blur-Radius 30
54. Layers- Arrange- Move Down
55. Repeat:
Layers- Arrange- Move Down
56. Activate the Top of the Layer Palette
57. Open the Tube "tube 9
"
58. Edit -Copy
59. Activate your work.
60. Edit - Paste as new layer.
61. Remove the watermark
62.
Image - Mirror - Mirror Horizontal (Image - Mirror in older versions of PSP)
63. Pick Tool: (K) on your keyboard -Enter these parameters on the toolbar
Position X 595 - PositionY 38
64. Effects- 3D-Effects-Drop Shadow with the same settings
65. Open the Tube "tube 7""
66. Edit -Copy
67. Activate your work.
68. Edit - Paste as new layer.
69. Remove the watermark
70. Image-Resize 80%
71. Pick Tool: (K) on your keyboard -Enter these parameters on the toolbar
Position X 2-- Position Y 121
72. Effects- 3D-Effects-Drop Shadow with the same settings
73. Open the Tube "deco_pas_les33"
74. Edit -Copy
75. Activate your work.
76. Edit - Paste as new layer.
77. Pick Tool: (K) on your keyboard -Enter these parameters on the toolbar
Position X 197 - Position Y 90
78. Layers- Duplicate
79. Pick Tool: (K) on your keyboard -Enter these parameters on the toolbar
position X 607--PositionY 440
80. Layers- Merge- Merge Down
81. Layers- Arrange- Move Down- Repeat: Layers -Arrange- Move Down
82. Activate the Top of the Layer Palette
83. Open the Tube "deco1_pas_les33"
84. Edit -Copy
85. Activate your work.
86. Edit - Paste as new layer.
87. Pick Tool: (K) on your keyboard -Enter these parameters on the toolbar
Position X 197 - Position Y 408
88. Effects- Plugins- EyeCandy5/ Impact/ PerspectiveShadow / Reflect in Front.
89. Open the Tube "deco2_pas_les33 "
90. Edit -Copy
91. Activate your work.
92. Edit - Paste as new layer.
93. Pick Tool: (K) on your keyboard -Enter these parameters on the toolbar
Position X 306 - Position Y 60
94. Layers- Duplicate
95. Image - Mirror - Mirror vertical ( Image - Flip in older versions of PSP)
96. Pick Tool: (K) on your keyboard -Enter these parameters on the toolbar
Position X 310 - Position Y 103
97. Layers Properties- -Reduce the Opacity of this layer to 30%
98. Open the Tube "D
"
99. Edit -Copy
100. Activate your work.
101. Edit - Paste as new layer.
102. Pick Tool: (K) on your keyboard -Enter these parameters on the toolbar
Position X 233 - Position Y 154
103. Effects- 3D-Effects-Drop Shadow with these settings: 1, 1, 100, 0 Color Black
104. Add you watermark on new layer..
105. Save as JPG
I hope you enjoyed this lesson
I am curious to see your work. Please send it to me in original size.
I will post it with the other lessons . Here
Please include your name and the title and number
Good luck !
Thank you for creating the lesson.
Questions related to the lesson ? Or submit the lesson? Mail me
Greetings Castorke


Copying this lesson, in whole or in part, without the author's permission is prohibited.
The lessons are registered with TWI.

België
2023