Tubes: : Scrap Sweet kisses van Adriana..
Mehdi/ Sorting Tiles
I thank the tubers for their lovely material
Leave the watermark of the tube intact
The copyright belongs to the original artist. Leave credit with the creator.
Open the tubes in a map of your choice or in the program PSP.
Let's start the lesson
Take me with you, I'll show you where you left off.

1. Open your color palette in your psp_val_les38

2. Material Properties: Set your Foreground color to color 1: #be314f
- Set your Background color to color 2: : #ffffff
3. File-Open a New Transparent Image in this size : 900 x 600 Px.
4. Selections -Select All.
5. Open the image "Sweet Kisses Paper (10) "
6. Edit- Copy
7. Activate your work.
8. Edit - Paste into Selection .
9. Selections- Select None.
10. Layers-Duplicate.
11. Effects/Plugins/ Mehdi/ Sorting Tiles crossed 400
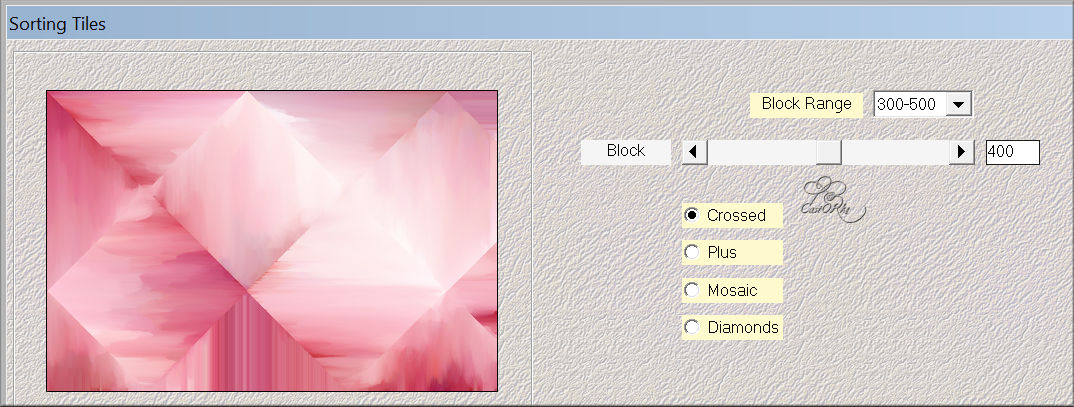
12. Layers-Properties-Set the Blend Mode to "Saturation ( Legacy)"
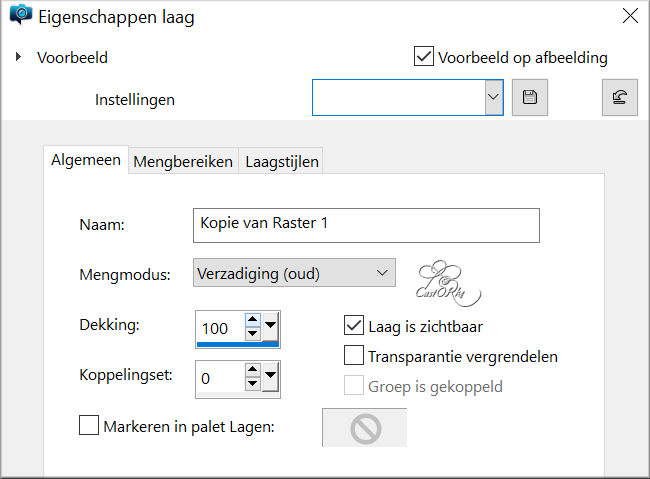
13. Layers- New Raster Layer
14. Activate Flood Fill Tool-fill the selection with color 2 (white)
15. Open the Mask: NarahsMasks_1763
16. Activate your work.
17. Layers- New Mask Layer- From Image and select Mask
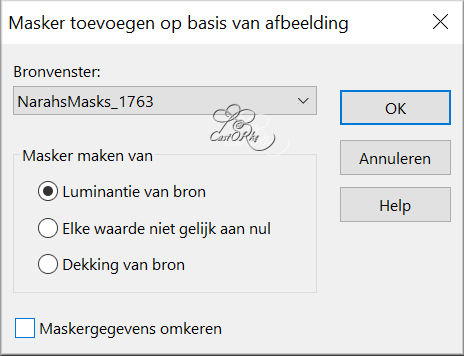
18. Layers Merge- Merge Group.
19. Layers-Properties-Set the Blend Mode to "Hard Light"
20. Effects- Edge Effects-Enhance More.
21. Open the Tube "Sweet Kisses Element (105) "
22. Edit- Copy
23. Activate your work.
24. Edit- Paste as new layer.
25. Image Resize- 60%
Resize all layers not checked
26. Pick Tool: (K) on your keyboard -Enter these parameters on the toolbar
Position X 245 - Position Y 254
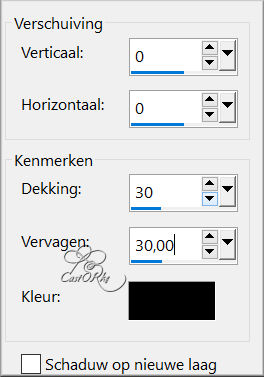
27. Effects- 3D-Effects-Drop Shadow with these settings: 0, 0, 30, 30 color black
28. Open the Tube "Sweet Kisses Tubes 2 (1) "
29. Edit- Copy
30. Activate your work.
31. Edit- Paste as new layer.
32. Image Resize- 2 X 80%
33. Move to the bottom left ( see finished image).
34. Effects- 3D-Effects-Drop Shadow with these settings: 0, 0, 30, 30 color black
35. Open the Tube "Sweet Kisses Element (89)"
36. Edit- Copy
37. Activate your work.
38. Edit- Paste as new layer.
39. Image Resize- 50%
40. Pick Tool: (K) on your keyboard -Enter these parameters on the toolbar
Position X 370-- Position Y 17
41. Effects- 3D-Effects-Drop Shadow with these settings: 0, 0, 30, 30 color black
42. Open the Tube "3019 - miguel angel silvestre - LB TUBES"
43. Edit- Copy
44. Activate your work.
45. Edit- Paste as new layer.
46. Image Resize- 80%
47. Move to the bottom right ( see finished image).
48. Effects- 3D-Effects-Drop Shadow with these settings: 0, 0, 30, 30 color black.
49. Image - Add borders-Symmetric checked: 1 Px color 1
50. Image - Add borders-Symmetric checked: 1 Px color 2
51. Image - Add borders-Symmetric checked: 1 Px color 1
52. Image - Add borders-Symmetric checked: 15 Px color 2
53. Image - Add borders-Symmetric checked: 1 Px color 1
54. Image - Add borders-Symmetric checked: 1 Px color 2
55. Image - Add borders-Symmetric checked: 1 Px color 1
56. Image - Add borders-Symmetric checked: 50 Px color 2
57. Open the Tube "deco_val_les38 "
58. Edit- Copy
59. Activate your work.
60. Edit - Paste as new layer
61. Open the Tube "text_sweetkisses "
62. Edit- Copy
63. Activate your work.
64. Edit - Paste as new layer
65. Image - Add borders-Symmetric checked: 1 Px color 1
66. Image - Add borders-Symmetric checked: 1 Px color 2
67. Image - Add borders-Symmetric checked: 3 Px color 1
68. Image Resize- 900 pixels width-Resize all layers- Checked
69. Add you watermark on new layer..
70. Save as JPG
I hope you enjoyed this lesson
I am curious to see your work. Please send it to me in original size.
Do include your name, the lesson number, and the title.
I'll post it with the other works
HEREGood luck !
Questions related to the lesson ? Or submit the lesson?
Mail meGreetings Castorke
